The Best Way to Learn the VTS MetaTrader Expert Advisor
Builder: Step 2
Step 2.
Review the basics
You don’t have to read the entire help document to get
started, but you do need to understand these basics:
Elements are the basic building blocks in VTS.
There 5 types: Start and End; and then Function, Logic and Variable. Read more
here:
open in this page
open in new page
The VTS application has a Toolbox on the left that holds
all Elements. Read more here:
open in
this page
open in new page
Elements are dragged from the ToolBox and dropped on to
the Drawing Pad. Read more here:
open
in this page
open in new page
Watch the Step 2 video:
Step
3.
Create an empty System, an EA that does nothing (on a Demo account)
From the Welcome screen, click the “Create New System”
button and then click the “EA Builder” button.
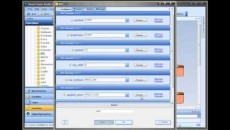
On the “New System” window, uncheck all of the drawings
in the “Add Drawings” list (OpenBuyTrade, OpenSellTrade, CloseBuyTrade,
CloseSellTrade) and click OK.
This creates a single-drawing System with just a Start
Element connected to an End Element. (We’ll assume the name of the system is
“System1”).
Click the “Build” button on the VTS Main menu. Read
more here:
open in
this page
open in new page
You may be prompted to enter the path to the tools in
your MetaTrader platform. Read more here:
open in
this page
open in new page
View the Output in the Output tab on the bottom of VTS.
The build should have been successful. Read more here:
open
in this page
open in new page
Open your MetaTrader platform by clicking on the
“Platform” button in VTS. This will open MetaTrader in a VTS tab.
In your MetaTrader platform, in the “Navigator” window on
the left, open the “Expert Advisors” menu, find the EA named “System1” and
attach it to a price chart (Drag and drop, or double-click it). Read more here:
open
in this page
open in new page
Notice all of the “Variables” on the “Inputs” tab.
Where did they all come from? These are variables that are needed by almost
every EA, so they are automatically created by VTS. Many of them can not be
deleted because they are referenced by name in the VTS trading functions. If you
do manage to delete them, you’ll see build errors (please don’t try).
These input variables can be edited in VTS using the Input Manager. Read
more here:
open
in this page
open in new page
Select OK to attach the EA to the chart. This EA
does nothing. Remove the EA from the chart (Right-click->Expert
Advisors->Remove).
Watch the Step 3 video:
Step
4.
Add a message to the Expert Advisor
Go back to the main system drawing (the tab named
“System1”)
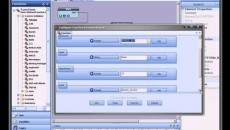
Click the (+) on the End Element to open the
configuration window.
Click the “Message” tab.
On the “Message” tab, check “Send Message”, then
check “Write on Chart”. (“Write to Journal” should already be checked)
Click “Done” on the End configuration window to save and
close.
Click the “Build” button on the VTS Main menu. Read
more here:
open in
this page
open in new page
Go back to your MetaTrader platform and attach the EA to
a chart.
In your MT platform, open the “Experts” tab in the
“Terminal” window. Read more here:
open
in this page
open in new page
Notice the message from the End element that is written
to the Chart and to the “Experts” tab. The message is written each time
the EA executes, which is on each incoming tick from the MT server. Read more
here:
open in this page
open in new page
Remove the EA from the chart (Right-click->Expert
Advisors->Remove).
Remember This: All Elements have a
message tab that will send messages when the Element executes. Also, the
“Communication Manager” is used to send messages about system-wide events. Read
more here:
open in this page
open in new page
Watch the Step 4 video:
Step
5.
Add the lower band value of the Bollinger Bands technical indicator to the
Expert Advisor
Go back to the main system drawing (the tab named
“System1”).
Click the (+) on the End Element to open the
configuration window. Click the “Message” tab and uncheck “Send Message”. Click
“Done” on the End configuration window to save and close.
Click the “Functions” pane in the Toolbox. Read
more here:
open in this page
open in new page
Open the “Indicators” menu, then open the “MQL” menu.
Find the “iBands” menu item and drag it on to the middle
of the Drawing pad.
Select the link between the Start and End Element by
single-clicking it, and delete it by pressing the delete key on your keyboard.
Read more here:
open in
this page
open in new page
Connect a link from the Start Element to the “iBands1”
Function Element, and then from he “iBands1” Function Element to the End
Element.
Click the ‘Save” button on the VTS main menu to save the
Drawing.
Click the (+) button to open the “iBands” configuration
window. Read more here:
open
in this page
open in new page
Scroll down to the “mode” parameter. (Parameter 7 of 8)
Use the menu pull-down on the “mode” parameter to select
“MODE_LOWER”.
Use the menu pull-down on the “Done” button to select
“Save”. This will save the changes without closing the window.
Click the “Message” tab, check “Send Message”,
check “Write value of iBands”, then
check “Write on Chart”.
Click “Done” on the iBand configuration window to save
and close.
In VTS, click the “Build” button.
Go back to your MetaTrader platform and attach the EA to
a chart.
In your MT platform, open the “Experts” tab in the
“Terminal” window. Read more here:
open
in this page
open in new page
Notice the message from the iBand element that is written
to the Chart and to the “Experts” tab. The message is written each time
the EA executes, which is on each incoming tick from the MT server. Read more
here:
open in this page
open in new page
Remove the EA from the chart (Right-click->Expert
Advisors->Remove).
Remember This: When you change the
parameters of a function, it’s a good idea to give the function a meaningful
name instead of the generated name “iBands1”. For example, we could name
our “iBand” function something like “lowerBand”.
Watch the Step 5 video:
Step
6.
Create an Input parameter to be used by the Bollinger Bands technical
indicator
Go back to the main system drawing (the tab named
“System1”).
In the “System Properties” window, in the section “System
Managers”, click the “Input Manager” item. Read more here:
open in this page
open in new page
Click the “Add” button. Read more here:
open
in this page
open in new page
Leave the “Data Type” as Integer.
Set the name to “MyPeriod” (without the quotes)
Set the value to “20” (without the quotes).
Click “Done” on the Input Manager window to save and
close.
Click the (+) button to open the “iBands” configuration
window. Read more here:
open
in this page
open in new page
Find the “period” parameter. (Parameter 3 of 8)
In the “Period” parameter text-box, enter the name
“MyPeriod” (without the quotes).
Use the menu pull-down on the “Done” button to select
“Save”. This will save the changes without closing the window.
Find the “deviation” parameter. (Parameter 4 of 8)
Enter the value “2” (without the quotes).
Click “Done” on the iBand configuration window to save
and close.
In VTS, click the “Build” button.
Go back to your MetaTrader platform and attach the EA to
a chart.
Notice the variable “MyPeriod” in the “Inputs” list and
its value of 20. The “MyPeriod” value can now be changed each time the EA
is attached to a chart and it will be used as the Period parameter when the
iBand function is calculated.
In your MT platform, open the “Experts” tab in the
“Terminal” window. Read more here:
open
in this page
open in new page
Attach the “Bollinger Bands” indicator to the same chart
as your EA. In your MetaTrader platform, in the “Navigator” window
on the left, open the “Indicators” menu, find the indicator named “Bollinger
Bands” and attach it to a price chart (Drag and drop, or double-click it).
On the “Bollinger Bands” window, select OK to accept the
default values.
Notice the iBand value written to the “Experts” tab is
the same as the right most value of the lower-band on the price chart. (If you
float over the lower band on the MT price chart, a window will pop up with price
information).
Watch the Step 6 video:
Step
7.
Add a Logic Element to the Drawing pad
Go back to the main system drawing (the tab named
“System1”).
Click the “New Elements” pane in the Toolbox. Read
more here:
open in this page
open in new page
To add a new Logic Element to the drawing, drag and drop
a Logic item from the “New Elements” pane on to the Drawing pad. Or, while
over the drawing pad, you can right-click and select Logic from the
context-menu. Read more here:
open
in this page
open in new page
Add another End Element to the drawing. (Drag and drop
from “New Elements” or right-click select)
When an End Element is added to a drawing, it’s default
data type is “Boolean”. The main system drawing in VTS system represents
the “start” function of an EA. (The “start” function is the EA’s entry
point). The return value of the “start” function is “Integer”, so we need
to change the data type to “Integer”.
Click the (+) button on the End Element just added to the
drawing.
Use the “Data type” pull-down menu to select “Integer”.
In the “Name” text-box enter “end_false”
(without the quotes).
Click “Done” on the End configuration window to save and
close.
Change the name of the other End Element: Click the
(+) button; in the “Name” text-box enter “end_true” (without
the quotes); click “Done” to save and close.
Remove the link from the “iBands” Element to the End
Element.
Connect a link from the “iBands1” Function Element
to the Logic Element. (We’ll assume the name of the logic is “Logic1”).
Connect a link from the “True” output of the Logic
Element to the “end_true” End Element.
Connect a link from the “False” output of the Logic
Element to the “end_false” End Element.
Click the ‘Save” button on the VTS main menu to save the
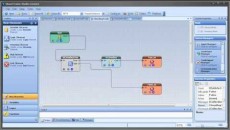
Drawing.
This drawing represents the flow of execution of the EA
on each tick. Execution begins at the Start Element, goes to the “iBands”
Element (which calculates the iBands value) then enters the Logic and will
follow the path of of the Logic Element that evaluates to true. Finally,
execution will stop at one of the End Elements.
Watch the Step 7 video:
Step
8.
Add a logical condition to the Logic Element
Click the (+) button on the Logic Element to open the
Logic configuration window. Read more here:
open
in this page
open in new page
In the “Left Operand” section of the “Condition 1”
section in the Logic configuration window, click the “Choose” button.
In the “Choose” window, click the “Price” tab, select
“Bid” and click “Done”.
In the “Right Operand” section of the “Condition 1”
section in the Logic configuration window, click the “Choose” button.
In the “Choose” window, click the “Local” tab, select
“_iBands1” and click “Done”. Note: The variable used to
hold the value of a function is the name of the function with a preceding
underscore. For example, if the name of the function is “iBands1”, the
name of the variable that holds the value calculated by the function is
“_iBands1”.
In the middle of “Condition 1” section in the Logic
configuration window, use the “Select an operator” pull-down menu to select
“LESS_THAN”.
Click “Done” on the Logic configuration window to save
and close.
Click the (+) button on the End Element “end_true” and
click the “Message” tab.
Check “Show Alert”.
In the “Message” text-box, delete the text and enter “bid
is less than the lower band”.
Click “Done” on the End configuration window to save and
close.
Click the (+) button on the End Element “end_false” and
click the “Message” tab.
Check “Send message”.
Check “Show Alert”.
In the “Message” text-box, delete the text and enter “bid
is more than the lower band”.
Click “Done” on the End configuration window to save and
close.
In VTS, click the “Build” button.
Go back to your MetaTrader platform and attach the EA to
a chart.
Notice the Alerts that are shown on each tick.
Remove the EA from the chart (Right-click->Expert
Advisors->Remove).
Watch the Step 8 video:
Step
9. Add another logical condition to the Logic Element
Add the “IsDemo” function to the drawing: in the
Functions Toolbox pane, select the “Advanced” menu, select the “Checkup” menu
and drag the “IsDemo” item on to the Drawing.
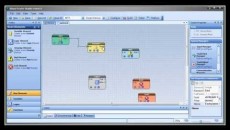
Attach the “IsDemo” function Element between the “Start”
Element and the “iBands” Element. (Actually, anywhere before the Logic Element
is fine)
Click the ‘Save” button on the VTS main menu to save the
Drawing.
Click the (+) button on the Logic Element to open the
Logic configuration window. Read more here:
open
in this page
open in new page
In the bottom right corner of the “Condition 1” section
click the “Add” button. Read more here:
open
in this page
open in new page
This adds another logical condition to the Logic Element
and brings it into focus. The name of the condition is “Condition 2”.
In the “Left Operand” section of the “Condition 2”
section in the Logic configuration window, click the “Choose” button.
In the “Choose” window, click the “Local” tab, select
“_IsDemo1” and click “Done”. Note: The variable used to hold
the value of a function is the name of the function with a preceding underscore.
In the “Right Operand” section of the “Condition 2”
section in the Logic configuration window, click the “Choose” button.
In the “Choose” window, click the “All” tab, select “MQL”
menu, select “true” and click “Done”. Or just type “true” into the text-box
(without the quotes).
Leave the “Select an operator” as “EQUAL_TO”.
In the Logic configuration window, scroll up and note the
value of the “Next” field is “AND”. The value of “AND” means that both
“Condition 1” and “Condition 2” must evaluate to
true in order for the entire Logic Element to evaluate to true. The
default value of the “Next” field is “AND”. Read more here:
open
in this page
open in new page
Click “Done” on the Logic configuration window to save
and close.
In VTS, click the “Build” button.
Now, in order for program-execution to follow the True
output path of the Logic element, two conditions must be true: the Bid price must be less than the
lower iBand, and the account must be a demo account.
Watch the Step 9 video:
Step
10. Open a Sell order (on a demo account)
The easiest way to open an order in VTS is to use the
function “fnOpenOrder”. In the Functions Toolbox pane, select the “Trade” menu,
and drag the “fnOpenOrder” item on to the Drawing.
Attach the “fnOpenOrder” function Element between the
“Logic” Element’s True output and the “end_true” Element.
Click the ‘Save” button on the VTS main menu to save the
Drawing.
Click the (+) button to open the “fnOpenOrder”
configuration window. Read more here:
open
in this page
open in new page
Find the “cmd” parameter. (Parameter 2 of 12)
Use the menu pull-down on the “cmd” parameter to select
“OP_SELL”.
Click “Done” on the “fnOpenOrder” configuration window to
save and close.
In VTS, click the “Build” button.
Go back to your MetaTrader platform and attach the EA to
a chart.
Use the Bollinger Band on the price chart to see if the
Bid price is above or below the Bollinger Band lower line.
If the current Bid price is below the lower band of the
Bollinger Band, a Sell order will be opened.
If the Bid price is not below the lower band, change the
Logic to “Bid greater than Lower Band”:
Remove the EA from the chart (Right-click->Expert
Advisors->Remove).
In VTS, click the (+) button on the Logic Element to open
the Logic configuration window. In “condition 1”, change the “Select an
operator” value to “GREATER_THAN”.
Click “Done” on the Logic configuration window to save
and close.
In VTS, click the “Build” button.
Go back to your MetaTrader platform and attach the EA to
a chart.
Now a Sell order should have opened. The account
must be a demo account and the market must be open. The order should
execute after the first tick. If the market is very quiet, this may take a
few minutes.
In your MT platform, open the “Journal” tab in the
“Terminal” window. Read more here:
open
in this page
open in new page
There should be entry showing that the order was opened,
for example:
2013.03.31 17:56:56 ‘1322550’: order was opened
: #20987987 sell 1.00 EURUSD at 1.28089 sl: 1.28289 tp: 1.27889
Did the order fail to open? There should be an error
message in the “Journal” tab.
Here are some reasons why an order would fail to open:
Experts are disabled. In your MT platform, on the top
center, make sure the “Expert Advisor” button is green.
Trading is disabled for the EA. When the EA is attached
to a chart, on the “Common” tab, make sure “Allow live trading” is checked.
There is not enough money in the account. Create a
new demo account: In the MetaTrader “Navigator” window, select “Accounts” menu,
right-click and select “Open an Account”. Note: You will need to re-enable
Expert Advisors after the account is changed.
The broker is an ECN broker, but the ECN flag is false.
Read more here:
open in
this page
open in new page
The Stoploss or Takeprofit are not valid values for the
account. In VTS, the default value for these is 200. These value
usually work micro, mini and standard accounts. However the value may not be
large enough for some micro accounts. The Stoploss and Takeprofit values
are Input variables, so they can be changed when the EA is attached to the
chart.
The Lot value is not valid for the account. n VTS,
the default value 1.0. The Lot value is an Input variable, so it can be
changed when the EA is attached to the chart.
See this list for the top 10 reasons a trade will not
open:
open in
this page
open in new page
To continue we need to successfully open a trade. Contact
your broker, or send us an email if you are stuck:
support@iExpertAdvisor.com
(Assuming the trade opened …)
Remove the EA from the chart (Right-click->Expert
Advisors->Remove).
In MetaTrader, go to the “Trade” tab in the “Terminal”
window. Read more here:
open in
this page
open in new page
Select the trade we just opened, right-click and select
“Close Order”.
Watch the Step 10 video:
Step
11.
Open more than one Sell order (on a demo account)
For our drawing: On each tick, execution begins at the
“Start” Element and flows through the Logic True output and executes the
“fnOpenOrder” function.
Question: Why did only one trade open? Why
doesn’t the EA open multiple trades since the the “fnOpenOrder” function should
be executing on each tick?
Answer: Because VTS uses a variable named “MaxTrades” to
control how many trades can be open at any time. The default value of
“MaxTrades” is 1, so VTS constructed MQL code that will not allow more than 1
trade to be opened. (This is the behavior most traders want: to open a
single trade based on some logic.)
The “OpenTrade” Manager is used to change the value of
“MaxTrades”.
In VTS, in the “System Properties” window, in the section
“System Managers”, click the “Open Trade Manager” item. Read more here:
open in this page
open in new page
Click the “Maximum” tab.
Change the value of “MaxTrades” to 2 and check the “Show
as input” checkbox.
Change the value of “MaxSells” to 2 and check the “Show
as input” checkbox.
Click “Done” to save and close the “Open Trade Manager”.
In VTS, click the “Build” button.
Go back to your MetaTrader platform and attach the EA to
a chart. On the “Inputs” tab notice the variables “MaxTrades” and
“MaxSells”.
Notice that 2 sell orders have been opened (this may take
a few ticks).
In the MT platform, right-click anywhere on the price
chart that is running the EA, select “Expert Advisors” and select “Properties”.
Change the values of the “MaxTrades” and “MaxSells”
variables to 3.
Click OK.
Notice that 3 sell orders have been opened (this may take
a few ticks).
Remove the EA from the chart (Right-click->Expert
Advisors->Remove).
Watch the Step 11 video:
Step
12.
Close trades (on a demo account)
There should be at least one trade open from the previous
step.
In VTS, delete the link going into the “fnOpenOrder”
Element and the link going out of the “fnOpenOrder” Element. Move the
“fnOpenOrder” Element aside but do not delete it from the Drawing Pad.
In the Functions Toolbox pane, select the “Trade”
menu, and drag the “fnCloseOrder” item on to the Drawing.
Connect the “fnCloseOrder” Element where the
“fnOpenOrder” Element was connected: between the True output of the Logic and
the “end_true” End Element.
Click the ‘Save” button on the VTS main menu to save the
Drawing.
Click the (+) button to open the “fnCloseOrder”
configuration window. Read more here:
open
in this page
open in new page
Note the “Order Selection” section on top. This
allows you to choose what orders to close, including using the magic number.
Read more here:
open in
this page
open in new page
Close the “fnCloseOrder” configuration window by
selecting “OK”. (We made no changes)
In VTS, click the “Build” button.
Go back to your MetaTrader platform and attach the EA to
a chart.
Notice that the sell orders closing (this may take
a few ticks). Only 1 order will be close per tick.
Remove the EA from the chart (Right-click->Expert
Advisors->Remove).
Remember This: To have an EA control
only the orders that it opens use the “MagicNumber” input variable. The
“MagicNumber” Input variable can be set when the EA is attached to a chart.
This same Input variable is used to set the “magic” parameter in the
“fnOpenOrder” function (it is found on the “Advanced” tab). The default
value set by VTS is 99999. You should set a unique value for each of your
EAs.
Need a break? You can add a
Text note to your drawing to remember where you stopped. Try this:
anywhere on the Drawing, right-click, select “Text”, double-click the Text note
and enter “stopped at step 12”. When you save the Drawing, the Note will
be saved.
Watch the Step 12 video:
Step
13.
Use the MetaTrader Strategy Tester
In VTS, remove the “fnCloseOrder” function and put the
“fnOpenOrder” function back between the True output of the Logic and the
“end_true” End Element.
Click the ‘Save” button on the VTS main menu to save the
Drawing.
In VTS, click the “Build” button.
Go back to your MetaTrader platform and open the
“Strategy Tester”: In the MT platform (not VTS) go to the “View” tab and select
“Strategy Tester”.
In the MT platform, a “Tester” window should appear below
the “Terminal” window. If you don’t see it, try increasing the size of the
MetaTrader window.
In the “Tester” window, use the “Expert Advisor” pulldown
menu to select our EA (“system1”).
In the “Tester” window, use the “Symbol” pulldown menu to
select a currency pair. I usually use one the majors for most testing, usually
EURUSD.
In the “Tester” window, use the “Model” pulldown menu to
select “open prices only”.
In the “Tester” window, use the “Period” pulldown menu to
select “H1”.
In the “Tester” window, check “Use date” and select about
a 1 month period. I used the period 2013.03.01 – 2013.04.01.
In the “Tester” window, leave “Visual mode” unchecked.
In the “Tester” window, click the “Start” button to start
the test.
The test should complete within a few seconds.
Go to the “Report” tab and view the results: about 114
total trades, about 44 of them profitable.
Go to the “Results” tab to view the open and close
details of each trade.
If the test did not open any trades, there should be an
error message in the “Journal” tab.
Watch the Step 13 video:
Step
14.
Use the MetaTrader Strategy Tester to evaluate a Trailing stop
Click the (+) button to open the “fnOpenOrder”
configuration window. Read more here:
open
in this page
open in new page
Find the “trailingstop” parameter. (Parameter 8 of 12)
Check the “Use Trailing Stop” checkbox.
Click “Done” on the “fnOpenOrder” configuration window to
save and close.
In the “System Properties” window, in the section “System
Managers”, click the “Input Manager” item. Read more here:
open in this page
open in new page
In the “Input Manager” Configure screen, find the
Parameter, “TakeProfit”, click “edit” and set the value to “1000” (without the
quotes).
In the “Input Manager” Configure screen, find the
Parameter, “StopLoss”, click “edit” and set the value to “1000” (without the
quotes).
In the “Input Manager” Configure screen, find the
Parameter, “TrailingStop”, click “edit” and set the value to “100” (without the
quotes).
In VTS, click the “Build” button.
Go back to your MetaTrader platform and open the
“Strategy Tester”.
In the “Tester” window, click the “Start” button to start
the test.
The test should complete within a few seconds.
Go to the “Results” tab to view the open and close
details of each trade. In the “Type” column, notice the rows with
“modify”.
Each row with a “modify” type represents the EA executing
the trailing stop logic and modifying the order.
Watch the Step 14 video:
Step
15.
Use the MetaTrader Strategy Tester with the TradeTime Manager
Click the (+) button to open the “fnOpenOrder”
configuration window. Read more here:
open
in this page
open in new page
Find the “trailingstop” parameter. (Parameter 8 of 12)
Uncheck the “Use Trailing Stop”
checkbox.
Click “Done” on the “fnOpenOrder” configuration window to
save and close.
In the “System Properties” window, in the section “System
Managers”, click the “TradeTime Manager” item. Read more here:
open in this page
open in new page
In the section named “Rule 1”:
Check the “Enable” checkbox.
Use the pulldown-menu to set the “Day” to “Friday”.
Use the pulldown-menu to set the “Start Hour” to “14”.
Leave the “Start Minute” as “0”.
Use the pulldown-menu to set the “End Hour” to “23”.
Use the pulldown-menu to set the “End Minute” to “59”
Leave the “Action” as “TTT_RULE_CLOSE_ALL”
Click “Done” on the “TradeTime Manager” configuration
window to save and close.
This trade-time rule will close all open trades after
14:00 on Fridays.
In VTS, click the “Build” button.
Go back to your MetaTrader platform and open the
“Strategy Tester”.
In the “Tester” window, click the “Start” button to start
the test.
The test should complete within a few seconds.
Go to the “Results” tab to view the open and close
details of each trade. In the “Type” column, notice the rows with “close”.
Each row with a “close” type represents the EA closing
the order due to the trade-time rule. Note that the “Time” column for each is
“14:00”.
Watch the Step 15 video:
Step
16.
Use the MetaTrader Strategy Tester with the TradeSignal Manager , part I
Remove the trade-time rule: In VTS, in the “System
Properties” window, in the section “System Managers”, click the “TradeTime
Manager” item.
In the section named “Rule 1”, uncheck
the “Enable” checkbox.
Click “Done” on the “TradeTime Manager” configuration
window to save and close.
In the “System Properties” window, in the section “System
Managers”, click the “TradeSignal Manager” item. Read
more here:
open in this page
open in new page
Check “NEXT_SIGNAL_RULE_OPEN_NONE”. This rule will
not allow the EA to open any trades after opening the first trade.
Click “Done” on the “TradeSignal Manager” configuration
window to save and close.
In the “System Properties” window, in the section “System
Managers”, click the “OpenTrade Manager” item
Click the “Maximum” tab
Change MaxTrades to “1” and MaxSells to “1”
Click “Done” on the “OpenTrade Manager” configuration
window to save and close.
In VTS, click the “Build” button.
Go back to your MetaTrader platform and open the
“Strategy Tester”.
In the “Tester” window, click the “Start” button to start
the test.
The test should complete within a few seconds.
Go to the “Results” tab to view the open and close
details of each trade. Note that only 1 trade was opened.
Watch the Step 16 video:
Step
17.
Use the MetaTrader Strategy Tester with the TradeSignal Manager, part II
In VTS, in the “System Properties” window, in the section
“System Managers”, click the “TradeSignal Manager” item.
Uncheck “NEXT_SIGNAL_RULE_OPEN_NONE”.
This rule will not allow the EA to open any trades after opening the first
trade.
Check “NEXT_SIGNAL_RULE_CANDLE_DELAY”.
Click the “Delay” button. Enter “72” (without the
quotes) and select OK.
Note: The test is running on a 1 hour chart, so 72
candles equals 72 hours, or 3 days.
Click “Done” on the “TradeSignal Manager” configuration
window to save and close.
In VTS, click the “Build” button.
Go back to your MetaTrader platform and open the
“Strategy Tester”.
In the “Tester” window, click the “Start” button to start
the test.
The test should complete within a few seconds.
Go to the “Results” tab to view the open and close
details of each trade. Note there is at least 3 days bewteen each trade
opening. (For the trade openings, the “Type” column is “sell”. The
“s/l” or “t/p” entries can be within 3 days because these are the close time of the
trade).
Watch the Step 17 video:
Step
18.
Use the MetaTrader Strategy Tester to evaluate Money Management
Remove the signal rule: In VTS, in the “System
Properties” window, in the section “System Managers”, click the
“TradeSignal Manager” item.
Uncheck “NEXT_SIGNAL_RULE_CANDLE_DELAY”.
Click “Done” on the “TradeSignal Manager” configuration
window to save and close.
On the VTS Drawing, click the (+) button to open the
“fnOpenOrder” configuration window. Read more here:
open
in this page
open in new page
Find the “volume” parameter. (Parameter 5 of 12)
Click the “MM value” radio button.
Enter “10.00” into the percent field (without the
quotes). We are using a large number so we that we can see the effect in
our test.
Leave the pull-done menu as “AccountBalance”.
Note: These settings will calculate a lot size (or
volume) that will not risk more than 10% of the account balance. The
calculation uses the stoploss value to determine the greatest possible loss.
Click “Done” on the “fnOpenOrder” configuration window to
save and close.
In VTS, click the “Build” button.
Go back to your MetaTrader platform and open the
“Strategy Tester”.
In the “Tester” window, on the “Settings” tab, change the
date to span about 1 year. I used 2012.04.01 – 2013.03.30.
Click the “Start” button to start the test.
The test should complete within a few seconds.
Go to the “Results” tab to view the open and close
details of each trade. Note how the “Size” value increases and decreases
as the account balance increases and decreases.
Watch the Step 18 video:
Part II. Building a Trading System
Congratulations, you have
mastered the basics. Now we are going apply your knowledge towards
building a real-life trading Expert Advisor.
Step
19.
Create a new System (on a Demo account)
From the Welcome screen, click the “Create New System”
button and then click the “EA Builder” button.
On the “New System” window, leave all the drawings
checked in the “Add Drawings” list (OpenBuyTrade, OpenSellTrade, CloseBuyTrade,
CloseSellTrade) and click OK. (We’ll assume the name of the system is
“system2”).
This creates a five-drawing System. The main System
Drawing named “system2” and the 4 trading-function Drawings.
To open a trading-function Drawing, double-click the
caption of the Function Element, or click the Drawing tab with its name (for
example “OpenBuyTrade”). Note: When you close and reopen this system, only
the System drawing will be opened in a tab, you’ll need to double-click the
Function Element to open a function-drawing.
We are going to create a breakout system. First
we’ll focus on the trade entries. Here are the descriptions for the Buy and Sell
entries:
“Open a Buy trade when the Ask price is N points above
the ‘highest high’ in the last M bars”
“Open a Sell trade when the Bid price is N points below
the ‘lowest low’ in the last M bars”
Where and N and M are any (positive) integer.
Then we’ll focus on the trade exits. Here are the
descriptions for the Buy and Sell exits:
“Exit the Buy trade when the profit is greater than X
dollars and the Ask price is below the highest-high minus (N times 2) points in
the last (M times 2) bars.”
“Exit the Sell trade when the profit is greater than X
dollars and the Bid price is above the lowest-low plus (N times 2) points in the
last (M times 2) bars.”
Yes, the descriptions are a bit wordy, but don’t worry,
I’ll break down the logic down further as we implement each trading-function.
Watch the Step 19 video:
Step
20.
Build the Open-Buy Logic for a “Breakout” Expert Advisor
In VTS, open the “OpenBuyTrade” function-drawing by
double-cliking the caption of the Element.
Check it out: The drawing already has a Logic Element, an
“fnOpenBuy” Element and 2 End Elements. You could have easily drag, dropped and
connected these Elements yourself, but VTS does it automatically when you select
to have the “OpenBuyTrade” drawing created.
We’ll create the open-buy logic in four steps:
i. Define the input parameters
ii. Get the highest-high value
iii. Add the “points” to the highest-high value
iv. Define the logic
Let’s quickly review the open-buy description:
“Open a Buy trade when the Ask price is N points above
the ‘highest high’ in the last M bars”
(i) First, we’ll create Input parameters for N and M that
make sense.
For N, we’ll create an Input parameter named
“PointsAbove”
For M, we’ll create an Input parameter named
“ChannelBars”
In the “System Properties” window, in the section “System
Managers”, click the “Input Manager” item. Read more here:
open in this page
open in new page
Click the “Add” button. Read more here:
open
in this page
open in new page
Leave the “Data Type” as Integer.
Set the name to “PointsAbove” (without the quotes)
Set the value to “10” (without the quotes).
Again, click the “Add” button.
Leave the “Data Type” as Integer.
Set the name to “ChannelBars” (without the quotes)
Set the value to “20” (without the quotes).
Click “Done” on the Input Manager window to save and
close.
(ii) Now, let’s use a function to get the ‘highest-high’
value.
Click the “Functions” pane in the Toolbox. Read
more here:
open in this page
open in new page
Open the “Bar” menu.
Find the “fnGetHighest” menu item and drag it on to the Drawing pad.
Connect the “fnGetHighest” Element between the Start
Element and the Logic Element.
Click the ‘Save” button on the VTS main menu to save the
Drawing.
Click the (+) button to open the “fnGetHighest” configuration
window. Read more here:
open
in this page
open in new page
Finf the “endbar” parameter. (Parameter 4 of 4)
Enter the value “ChannelBars” (without the quotes)
Click “Done” on the “fnGetHighest” configuration window to save
and close.
In VTS, click the “Build” button.
(iii) We’ll use a Variable to perform the math needed to
add the “PointsAbove” value to the highest-high, and to store the value.
Click the “New Elements” pane in the Toolbox. Read
more here:
open in this page
open in new page
Drag a new Variable Element on to the Pad.
Connect it after the “fnGetHighest” Element and before
the “IsOpenBuyTrue” logic Element.
Click the (+) button to open the Variable configuration
window. Read more here:
open
in this page
open in new page
In the “Name” field, enter “buyhigh” (without the quotes)
Set the “Variable data type” to “Double”
Set the “Variable scope” to “System”
On the “Done” pull-down menu, select “Save” to save the
change and leave the window open.
In the Variable configuration window, click the
“Assignment” tab. This gets a little trick, so pay close attention.
We want to create a variable whose value is the
highest-high plus the “PointsAbove” value.
The “PointsAbove” value is an integer number, like 10,
15, etc. The highest-high value is a decimal number like 1.3456. We
don’t want to add 10 to 1.3456 – I’ve never seen a price value of 11.3456!
If the “PointsAbove” value is 10, we actually want to add
0.0010 to the highest-high. To change the Integer value (10) to a decimal
value (0.0010) we multiple the Integer value by the MQL built-in variable
Point.
Why don’t we just define “PointsAbove” as a “Double” and
enter the value as 0.0010? Two reasons:
It’s a pain to enter the value 0.0010 and it is error
prone.
More importantly, the EA will only work on charts were
0.0010 represents 10 points of movement (Think JPY). If you use the MQL
variable Point, the value will always be correct for
any price chart.
I assume the name of the “fnGetHighest” function is
“fnGetHighest1”.
In the “Assignment” tab, in the “Value” field enter:
_fnGetHighest + PointsAbove * Point
What does this mean? We are taking the
highest-value, which is stored in “_fnHighestHigh1” and adding to it the
“PointAbove” value multiplied by the MQL variable Point. Note that the
order of operations (multiplication first, addition second) will ensure the
value is multiplied first, and then added.
Click “Done” on the Variable assignment window to save
and close.
In VTS, click the “Build” button.
View the Output in the Output tab on the bottom of VTS.
Check if the build was successful. Read more here:
open
in this page
open in new page
It’s easy to mis-type one of the values. For
example, the first time I entered the values I forgot the “s” on PointsAbove, so
I got this error:
2;75;C:Program Files (x86)MetaTrader
4expertssystem2.mq4;253:27;’PointAbove‘ – variable not
defined
I opened the “buyhigh” variable, added the “s”, saved and
rebuilt:
Exp file “C:Program Files (x86)MetaTrader
4expertssystem2.ex4” produced – 0 error(s), 0 warning(s)
(iv) Now we are ready to configure the Logic.
Notice the Logic has the meaningful name “IsOpenBuyTrue”.
We’ll configure this Logic to return true when “the Ask price is ‘PointsAbove’
points above the ‘highest high’ in the last ‘ChannelBars’ bars”.
Click the (+) button on the “IsOpenBuyTrue” Logic Element to open the
Logic configuration window. Read more here:
open
in this page
open in new page
In the “Left Operand” section of the “Condition 1”
section in the Logic configuration window, click the “Choose” button.
In the “Choose” window, click the “Price” tab, select
“Ask” and click “Done”.
In the “Right Operand” section of the “Condition 1”
section in the Logic configuration window, click the “Choose” button.
In the “Choose” window, click the “Local” tab, select
“buyhigh” and click “Done”.
In the middle of “Condition 1” section in the Logic
configuration window, use the “Select an operator” pull-down menu to select
“GREATER_THAN”.
Click “Done” on the “IsOpenBuyTrue” configuration window to save
and close.
In VTS, click the “Build” button.
OK, we are done with the open-buy drawing! You may want
to open the “fnOpenBuy” function to review the settings or adjust some of the
parameters, but the default parameters should work fine for this EA.
Watch the Step 20 video:
Step
21.
Build the Open-Sell Logic for the “Breakout” Expert Advisor
In VTS, go back to the main system drawing “system2” and
open the “OpenSellTrade” function-drawing by double-clicking the caption of the
Element.
Agian, we’ll follow four steps to build the open-sell
logic:
i. Define the input parameters
ii. Get the highest-high value
iii. Add the “points” to the highest-high value
iv. Define the logic
Let’s quickly review the open-sell description:
“Open a Sell trade when the Bid price is N points below
the ‘lowest low’ in the last M bars”
(i) First, we’ll create Input parameters for N and M
For N, we’ll create an new Input parameter for the
sell-logic named “PointsBelow”.
For M, we’ll re-use the Input
parameter “ChannelBars” that we created for the buy-logic.
In the “System Properties” window, in the section “System
Managers”, click the “Input Manager” item. Read more here:
open in this page
open in new page
Click the “Add” button. Read more here:
open
in this page
open in new page
Leave the “Data Type” as Integer.
Set the name to “PointsBelow” (without the quotes)
Set the value to “10” (without the quotes).
Click “Done” on the Input Manager window to save and
close.
(ii) Now, let’s use a function to get the ‘lowest-low’
value.
Click the “Functions” pane in the Toolbox. Read
more here:
open in this page
open in new page
Open the “Bar” menu.
Find the “fnGetLowest” menu item and drag it on to the Drawing pad.
Connect the “fngetLowest” Element between the Start
Element and the “IsOpenSellTrue” Logic Element.
Click the ‘Save” button on the VTS main menu to save the
Drawing.
Click the (+) button to open the “fnGetLowest” configuration
window. Read more here:
open
in this page
open in new page
Finf the “endbar” parameter. (Parameter 4 of 4)
Enter the value “ChannelBars” (without the quotes)
Click “Done” on the “fnGetLowest” configuration window to save
and close.
In VTS, click the “Build” button.
(iii) We’ll use a Variable to perform the math needed to
subtract the “PointsBelow” value from the lowest-low, and to store the value.
Click the “New Elements” pane in the Toolbox. Read
more here:
open in this page
open in new page
Drag a new Variable Element on to the Pad.
Connect it after the “fnGetLowst” Element and before the
“IsOpenSellTrue” logic Element.
Click the (+) button to open the Variable configuration
window. Read more here:
open
in this page
open in new page
In the “Name” field, enter “selllow” (without the quotes)
Set the “Variable data type” to “Double”
Set the “Variable scope” to “System”
On the “Done” pull-down menu, select “Save” to save the
change and leave the window open.
In the Variable configuration window, click the
“Assignment” tab. This gets a little trick, so pay close attention.
We want to create a variable whose value is the
lowest-low minus the “PointsBelow” value.
I assume the name of the “fnGetLowest” function is
“fnGetLowest1”.
In the “Assignment” tab, in the “Value” field enter:
_fnGetLowest – PointsBelow * Point
Click “Done” on the Variable assignment window to save
and close.
In VTS, click the “Build” button.
View the Output in the Output tab on the bottom of VTS.
Check if the build was successful.
(iv) Now we are ready to configure the Logic.
We’ll configure the “IsOpenSellTrue” Logic to return true
when “the Bid price is ‘PointsBelow’ points below the ‘lowest low’ in the last
‘ChannelBars’ bars”.
Click the (+) button on the “IsOpenSellTrue” Logic Element to open the
Logic configuration window.
In the “Left Operand” section of the “Condition 1”
section in the Logic configuration window, click the “Choose” button.
In the “Choose” window, click the “Price” tab, select
“Bid” and click “Done”.
In the “Right Operand” section of the “Condition 1”
section in the Logic configuration window, click the “Choose” button.
In the “Choose” window, click the “Local” tab, select
“selllow” and click “Done”.
In the middle of “Condition 1” section in the Logic
configuration window, use the “Select an operator” pull-down menu to select
“LESS_THAN”.
Click “Done” on the “IsOpenSellTrue” configuration window to save
and close.
In VTS, click the “Build” button.
We are done building the open-sell drawing. You may want
to open the “fnOpenSell” function to review the settings or adjust some of the
parameters, but the default parameters should work fine for this EA.
Note the order in which the Elements are connected:
The Function Element “fnGetLowest1” calculates the lowest-low, then the Variable
Element “selllow” subtracts 10 points from the lowest-low, and the finally the
“selllow” variable is used in the “IsOpenSellTrue” Logic. If the
“IsOpenSellTrue” Logic Element evaluates to true, the “fnOpenSell” function will
execute and open a sell order.
We have just built a “Breakout” Expert Advisor.
We could stop now and allow the stoploss or the
takeprofit to close the trade. Although we did not define the logic for
the CloseBuyTrade or CloseSellTrade drawings, the system will still build and
run correctly. However, itt will display a warning in the “ErrorsWarnings” tab
in the bottom of the VTS window if any Logic Elements are not defined.
Click the “ErrorsWarnings” tab in the bottom of the VTS.
You should see:
LOGIC IsCloseBuyTrue not configured correctly
BuildWarning
LOGIC IsCloseSellTrue not configured correctly
BuildWarning
These are just warnings informing you that the Logic was
not fully configured. Warnings do not prevent an EA from building.
In this case, we know the close-logic doesn’t need to be defined because the
stoploss and takeprofit will close the trade. In your Expert Advisors, you
can decide for yourself if the warning should be resolved or can be ignored.
Having said all that, we are going to define
close-logic for this EA.
Watch the Step 21 video:
Step
22.
Build the Close-Buy Logic for the “Breakout” Expert Advisor
In VTS, go back to the main system drawing “system2” and
open the “CloseBuyTrade” function-drawing by double-clicking the caption of the
Element.
Note the Drawing is very similar to the open-trade
drawings, except that the trading function is “fnCloseBuy”.
Agian, we’ll follow four steps to build the close-buy
logic:
i. Define the Input parameters
ii. Get the Function values
iii. Create the needed Variables
iv. Define the logic
Let’s quickly review the close-buy description:
“Exit the Buy trade when the profit is greater than X
dollars and the Ask price is below the highest-high minus (N times 2) points in
the last (M times 2) bars.”
(i) We’ll re-use the Input parameters for N and M, and
create a new Input for X
For N, we’ll re-use the Input parameter “PointsAbove”.
For M, we’ll re-use the Input parameter “ChannelBars”.
For X, we will create a new Input parameter named
“ProfitTarget”.
In the “System Properties” window, in the section “System
Managers”, click the “Input Manager” item. Read more here:
open in this page
open in new page
Click the “Add” button. Read more here:
open
in this page
open in new page
Leave the “Data Type” as Double.
Set the name to “ProfitTarget” (without the quotes)
Set the value to “100” (without the quotes).
Click “Done” on the Input Manager window to save and
close.
(ii) Get the Function values.
We will reuse the “fnGetHighest1” function defined in the
open-buy-logic drawing.
Click the “Functions” pane in the Toolbox. Read
more here:
open in this page
open in new page
Open the “System Functions” menu, and then open the
“system2” menu.
Find the “fnGetHighest1” menu item and drag it on to the Drawing pad.
Connect the “fnGetHighest1” Element between the Start
Element and the “IsCloseBuyTrue” Logic Element.
Click the ‘Save” button on the VTS main menu to save the
Drawing.
We need to get the profit of the trade. We’ll use the
function “fnGetOpenOrderInfo” to get the profit value. Read more here:
open in this page
open in new page
Click the “Functions” pane in the Toolbox. Read
more here:
open in this page
open in new page
Open the “Trade” menu.
Find the “fnGetOpenOrderInfo” menu item and drag it on to the Drawing pad.
Connect the “fnGetOpenOrderInfo” Element after the
“fnGetHighest1” Element and before the “IsCloseBuyTrue” Logic Element.
On the “fnGetOpenOrderInfo” Element, click the (+) to
open the configuration window.
For parameter 1, “InfoType”, use the pull-down menu to
select “INFO_PROFIT”.
The name of this function is not very helpful, so we’ll
change the name to something more meaningful:
In the “Name” field, enter “MyProfit” (without the
quotes)
Click “Done” on the configuration window to save
and close.
In VTS, click the “Build” button.
(ii) Get the Variables.
Click the “New Elements” pane in the Toolbox. Read
more here:
open in this page
open in new page
Drag a new Variable Element on to the Pad.
Connect it after the “MyProfit” Element and before the
“IsCloseBuyTrue” logic Element.
Click the (+) button to open the Variable configuration
window. Read more here:
open
in this page
open in new page
In the “Name” field, enter “closebuylow” (without the
quotes)
Set the “Variable data type” to “Double”
Set the “Variable scope” to “System”
On the “Done” pull-down menu, select “Save” to save the
change and leave the window open.
In the Variable configuration window, click the
“Assignment” tab.
We want to create a variable whose value is the
highest-high minus 2 mulitplied by the “PointsAbove” value.
I assume the name of the “fnGetHighest” function is
“fnGetHighest1”.
In the “Assignment” tab, in the “Value” field enter:
_fnGetHighest1- PointsAbove * Point * 2
Click “Done” on the Variable assignment window to save
and close.
In VTS, click the “Build” button.
View the Output in the Output tab on the bottom of VTS.
Check if the build was successful.
(iv) We are ready to configure the Logic.
We’ll configure the “IsCloseBuyTrue” Logic to return true
when “the profit is greater than ‘MyProfit’ dollars AND the Ask price is below
‘closebuylow”.
Click the (+) button on the “IsCloseBuyTrue” Logic Element to open the
Logic configuration window.
In the “Left Operand” section of the “Condition 1”
section in the Logic configuration window, click the “Choose” button.
In the “Choose” window, click the “Local” tab, select
“_MyProfit” and click “Done”.
In the “Right Operand” section of the “Condition 1”
section in the Logic configuration window, click the “Choose” button.
In the “Choose” window, click the “Inputs” tab, select
“ProfitTarget” and click “Done”.
In the middle of “Condition 1” section in the Logic
configuration window, use the “Select an operator” pull-down menu to select
“GREATER_THAN”.
Click the “Add” button in the bottom right corner of the
Logic configuration window. This will create “Condition 2”.
In the “Left Operand” section of the “Condition 2”
section in the Logic configuration window, click the “Choose” button.
In the “Choose” window, click the “Price” tab, select
“Ask” and click “Done”.
In the “Right Operand” section of the “Condition 2”
section in the Logic configuration window, click the “Choose” button.
In the “Choose” window, click the “Local” tab, select
“closebuylow” and click “Done”.
In the middle of “Condition 2” section in the Logic
configuration window, use the “Select an operator” pull-down menu to select
“LESS_THAN”.
Click “Done” on the “IsCloseBuyTrue” configuration window to save
and close.
In VTS, click the “Build” button.
We are done building the close-buy drawing. You may want
to open the “fnCloseBuy” function to review the settings or adjust some of the
parameters, but the default parameters should work fine for this EA.
Watch the Step 22 video:
Step
23.
There is no Step 23, carry on
Step
24.
Build the Close-Sell Logic for the “Breakout” Expert Advisor
In VTS, go back to the main system drawing “system2” and
open the “CloseSellTrade” function-drawing by double-clicking the caption of the
Element.
Again, we’ll follow four steps to build the close-sell
logic:
i. Define the Input parameters
ii. Get the Function values
iii. Create the needed Variables
iv. Define the logic
Let’s quickly review the close-sell description:
“Exit the Sell trade when the profit is greater than X
dollars and the Bid price is above the lowest-low plus (N times 2) points in the
last (M times 2) bars.”
(i) We’ll re-use the Input parameters for N, M, and X
For N, we’ll re-use the Input parameter “PointsAbove”.
For M, we’ll re-use the Input parameter “ChannelBars”.
For X, we’ll re-use the Input parameter “ProfitTarget”.
(ii) Get the Function values.
We will reuse the “fnGetLowest1” function defined in the
open-buy-logic drawing.
Click the “Functions” pane in the Toolbox. Read
more here:
open in this page
open in new page
Open the “System Functions” menu, and then open the
“system2” menu.
Find the “fnGetLowest1” menu item and drag it on to the Drawing pad.
Connect the “fnGetLowest1” Element between the Start
Element and the “IsCloseSellTrue” Logic Element.
Click the ‘Save” button on the VTS main menu to save the
Drawing.
We will reuse the “MyProfit” function defined in the
close-buy-logic drawing.
Click the “Functions” pane in the Toolbox. Read
more here:
open in this page
open in new page
Open the “System Functions” menu, and then open the
“system2” menu.
Find the “MyProfit” menu item and drag it on to the Drawing pad.
Connect the “MyProfit” Element between the “fnGetLowest”
Element and the “IsCloseSellTrue” Logic Element.
Click the ‘Save” button on the VTS main menu to save the
Drawing.
In VTS, click the “Build” button.
(ii) Get the Variables.
Click the “New Elements” pane in the Toolbox. Read
more here:
open in this page
open in new page
Drag a new Variable Element on to the Pad.
Connect it after the “MyProfit” Element and before the
“IsCloseSellTrue” logic Element.
Click the (+) button to open the Variable configuration
window. Read more here:
open
in this page
open in new page
In the “Name” field, enter “closesellhigh” (without the
quotes)
Set the “Variable data type” to “Double”
Set the “Variable scope” to “System”
On the “Done” pull-down menu, select “Save” to save the
change and leave the window open.
In the Variable configuration window, click the
“Assignment” tab.
We want to create a variable whose value is the
highest-high minus 2 mulitplied by the “PointsAbove” value.
I assume the name of the “fnGetHighest” function is
“fnGetHighest1”.
In the “Assignment” tab, in the “Value” field enter:
_fnGetLowest1+ PointsBelow * Point * 2
Click “Done” on the Variable assignment window to save
and close.
In VTS, click the “Build” button.
View the Output in the Output tab on the bottom of VTS.
Check if the build was successful.
(iv) We are ready to configure the Logic.
We’ll configure the “IsCloseSellTrue” Logic to return
true when “the profit is greater than ‘MyProfit’ dollars AND the Bid price is
above ‘closesellhigh”.
Click the (+) button on the “IsCloseSellTrue” Logic Element to open the
Logic configuration window.
In the “Left Operand” section of the “Condition 1”
section in the Logic configuration window, click the “Choose” button.
In the “Choose” window, click the “Local” tab, select
“_MyProfit” and click “Done”.
In the “Right Operand” section of the “Condition 1”
section in the Logic configuration window, click the “Choose” button.
In the “Choose” window, click the “Inputs” tab, select
“ProfitTarget” and click “Done”.
In the middle of “Condition 1” section in the Logic
configuration window, use the “Select an operator” pull-down menu to select
“GREATER_THAN”.
Click the “Add” button in the bottom right corner of the
Logic configuration window. This will create “Condition 2”.
In the “Left Operand” section of the “Condition 2”
section in the Logic configuration window, click the “Choose” button.
In the “Choose” window, click the “Price” tab, select
“Bid” and click “Done”.
In the “Right Operand” section of the “Condition 2”
section in the Logic configuration window, click the “Choose” button.
In the “Choose” window, click the “Local” tab, select
“closehighlow” and click “Done”.
In the middle of “Condition 2” section in the Logic
configuration window, use the “Select an operator” pull-down menu to select
“GREATER_THAN”.
Click “Done” on the “IsCloseSellTrue” configuration window to save
and close.
In VTS, click the “Build” button.
We are done building the close-sell drawing. You may want
to open the “fnCloseSell” function to review the settings or adjust some of the
parameters, but the default parameters should work fine for this EA.
Congratulations, you have just
built a pretty decent Expert Advisor. There is a lot of room for
improvement and I’m sure you can think of creative ways to make the Breakout
system better.
Watch the Step 24 video:
Step
25.
Test the Breakout EA in the MetaTrader Strategy Tester
Go back to your MetaTrader platform and open the
“Strategy Tester”: In the MT platform (not VTS) go to the “View” tab and select
“Strategy Tester”.
Select the EA and choose a currency and a test period.
You may find that some of the values need to be adjusted
depending on the currency pair and the timeframe.
I tested on the EURUSD from 2013.03.01 to 2013.03.30 and
saw these results:
28 total trades, 14 winners, 14 losers. It
performed better in the beginning of the month. This EA is not ready to be
traded, but it does show some promise.
Watch the Step 25 video: